New and Updated
Please use the comments section at the end of the article to add your experiences so we all can learn from it.
Less, May be More
In some cases, it may just best to do very little or nothing at all. I have some old silk cabbies in my collection that a little rough around the edges but it really doesn’t bother me. There is some flaking paint and chips but I have chosen to leave them alone. When in doubt, leave it be. In some cases, the imperfections add character and yet in other cases they may really detract from the apparatus.
In some cases, a missing chip of paint can be colored in with a little dab of matched paint, may be all that is needed.
Proceed with Caution
But before proceeding, be sure this is something you feel comfortable taking on. If this is an extremely valuable piece of magic consult the experts before proceeding. Here are some things to think about:
- Take an estimated value of the apparatus as if it were in mint condition, and this sets the upper limit on how much damage you can do by restoring it in a poor way.
- Then consider the currently state of the apparatus. If it is such poor condition that is really doesn’t look good on a shelf of magic apparatus then you must strongly consider a restoration project.
- Consider also whether you will be just displaying the apparatus or would occasionally perform it. You may need to fix a mechanical defect for possible performance prop, whereas, you could leave it if it is more of a display item.
Matching Paint and Paint Touch-Ups
This most common restoration need is to paint scratched or missing paint. A bad paint restoration job can be much worse than doing nothing at all, so proceed with caution. Here are some tips:
- Buy some small cans of liquid paint in different colors from the same manufacturer (Red, Yellow, Blue, Black, Gold, White etc.)
- Mix the colors on a small palette to get the closest match.
- Consult a color mixing resource for help such as this one.
- Test a dab on piece of scrap and let it dry and compare to original
- Keep the mixed sample covered and refrigerated to avoid it drying before you are finished.
- Remix as necessary.
- Use the finest and smallest artists brushes and apply a very thin layer of paint on the area.
- Let it dry and adjust and recoat as needed.
Sometimes spray paint can be used but this can very tricky and generally not advisable unless a complete repaint is being done. Taping and masking an old prop may pull old paint off when removed and could result in a bigger disaster than the one you are trying to fix.
Fixing Mechanical Problems
One of the most common problems found would be loose or missing hardware such as a hinge. This can be tricky if the hardware is completely missing as it is tough to match. You can search the internet for the closest matching hardware. I also like to pick up hardware assortments at garage sales and I keep them in a big bin and search for just the right piece of new projects or restoration work.
If you are lucky, it is just the screws that are missing so it is also good to have a small selection of brass screws on hand to choose from. If the screw has just pulled out of the prop, fill the hole with some white or carpenters glue and place a small piece of toothpick cut to fit into the hole. For larger holes, you can use more than one toothpick or something a bit wider such as a small dowel. Let the hole dry and then reapply the screw and it should be nice and snug.
In some cases, you may also see some cracking in the area where the screw went it. If there is a crack, try to separate the wood in order to get some glue into the crack. Use a toothpick to force glue into the joint and then clamp it and carefully wipe off the excess with a damp cloth.
Missing Pieces
Probably the least controversial of all restoration techniques is to reconstruct missing pieces. Parts of magic tricks and apparatus get separated and lost. The first step is figure out what is missing and get some pictures. A good source for pictures is from fellow collectors who are usually happy to help send you a picture of the piece you are missing. Even better is to actually see the piece and hold it in your hand, so you can see how it is constructed. You can also use magic catalogs as a source of information, but many use illustrations which are not usually as good as a photograph.
I made a duplicate for a missing animal disk for a Don Redmon “Animal Farm” which turned out nicely. It was an easy matter since I had access to another disk from my collection. Other than matching the paint scheme and colors, a key to this restoration was getting a perfect circle cut. If I would have cut it out on a jig saw, it would never looked right as it is nearly impossible to get a perfect circular cut. So I used a band saw and small square of wood to make the circle from. I drilled a small hole in the center of the square and placed a nail protruding through a piece of scrap wood. This allowed me to place the square onto the nail and rotate it through the band saw to form a perfect circle.
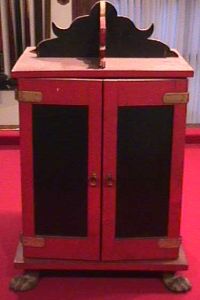
I still have some planned projects for constructing missing pieces for a Sherms Checker Cabinet. I have the cabinet but nothing else, no checkers, tube or fake. So far I haven’t been able to locate another one, but I do have an illustration from a catalog to go from.
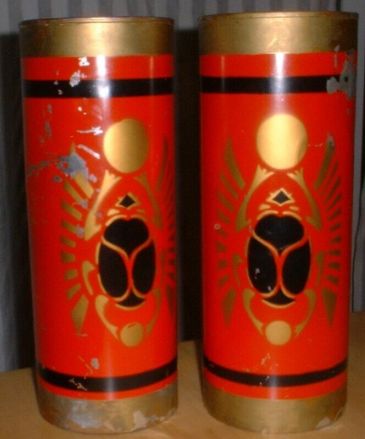
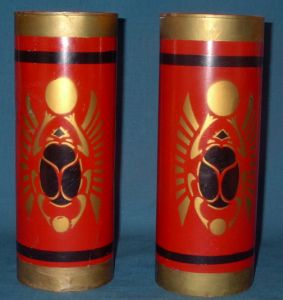
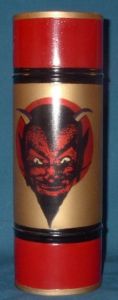
Metal Tubes
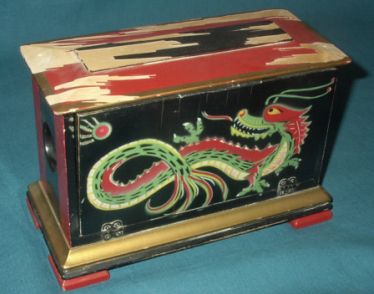
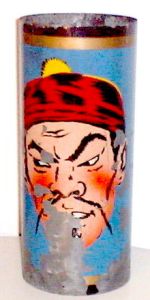
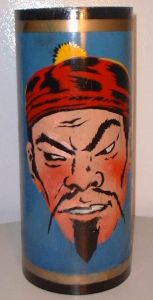
Metal tubes are the most problematic paint flaking disasters that I have encountered. Paint does not bond to metal as well as wood and may also suffer from inadequate preparation to allow for the paint to grab to the metal’s slick surface. If there is a large area of metal that is to be restored, prepare the area well by using some fine grit sandpaper so that paint will adhere better.
Other Damage
Sometime the damage is a bit more severe than a paint problem and repairs need to made before paint can be applied. This is usually from a trauma to prop such a dropping it which the wood has been damaged and chipped. If there is a cosmetic damaged section of wood, you can build up the section with some wood piece and glue. This work well for damaged ply wood as the plys tend to break apart from the impact and leave a jagged area to reconstruct. I had a project like this and was able to use small pieces of wood and glue to build up the damaged edge and then use a wood filler to fill in the gaps. Sanding and repainting then made the disaster almost unnoticeable.
This project actually had an interesting story behind it. I was bidding on a Vintage Dove Pagoda on eBay years ago and lost. The bidding went fairly high but can’t remember the exact details. Several weeks later I see that same pagoda on eBay again, but this time it was damaged from a shipping problem. I bought it at a fraction of the original cost and made the repair as described above. I don’t have any before photos but have the repaired after photos.
Complete Repainting
Sometime the paint is so far gone or someone else already repainted the apparatus where a complete repaint job is in order. One has to decide in this case whether they will try to match the original paint scheme to make it as original as possible or to do a custom paint job. This really depends on your preference.
If you are going to try to match the original paint scheme you will need to potentially construct stencils of any original artwork. Again if you the art is in good enough shape to copy, then you can do that, otherwise you need some good photographs to work from. Refer to my book Magic Stencil Techniques for more ideas here on making and using stencils.
The key with any repaint job is to prepare the old surface well by sanding and removing any old paint. Be careful as some older props may contain lead in the paint so get a lead test kit to be sure.
Conclusion
Restoration of your apparatus is really a personal choice. In some cases, the damage is so bad that a restoration project will really make a big difference. Try to consult with different people to get ideas on how to fix or restore something before you begin. If you have a restoration project, please submit it to the magicgizmo site so others can learn from your efforts.
Related: